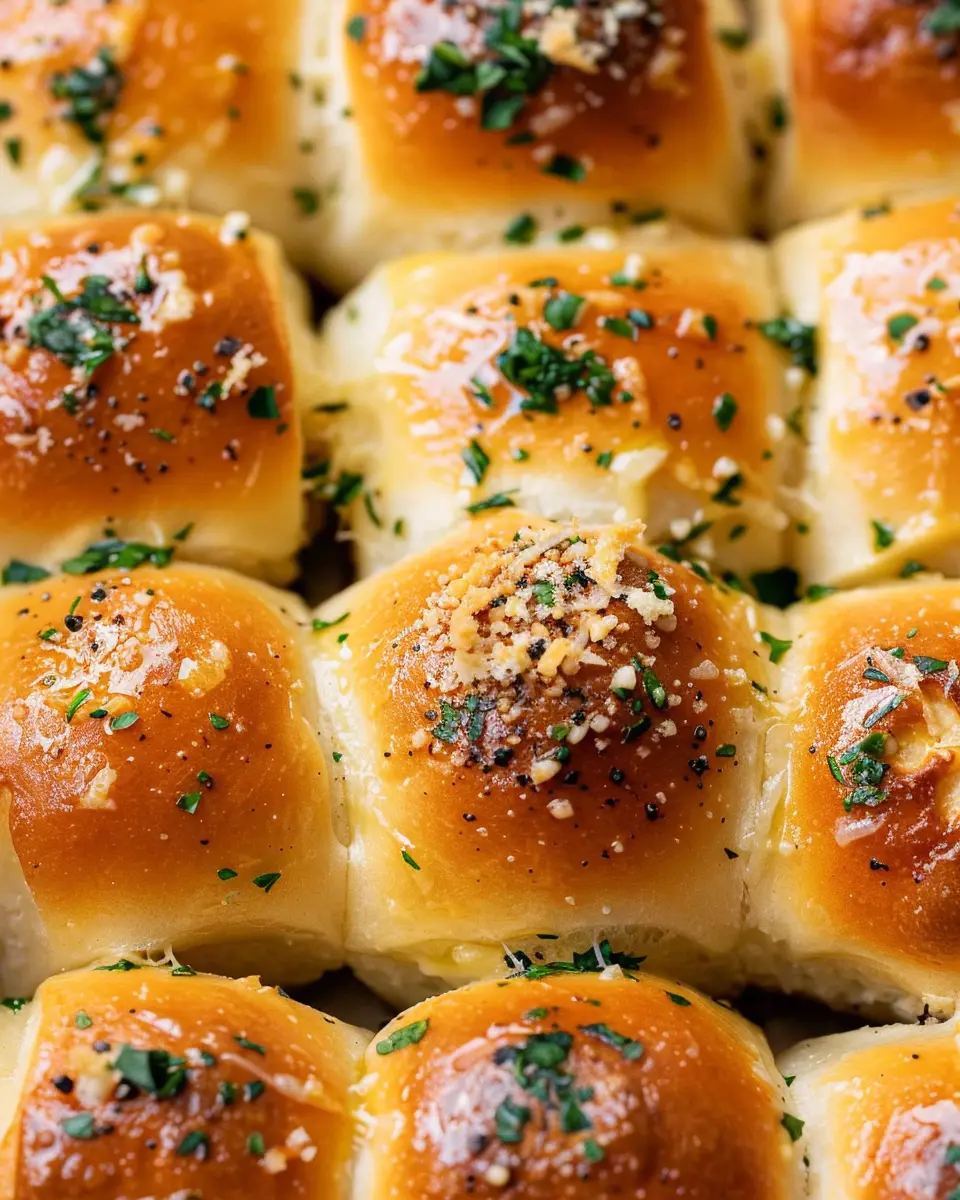
Introduction to Garlic Bread Rolls
What are Garlic Bread Rolls and Why You’ll Love Them?
When it comes to comforting, delicious treats that pair perfectly with just about any meal, garlic bread rolls have a special place in our hearts (and stomachs!). These scrumptious rolls combine fluffy, warm bread with a burst of garlicky goodness that’s hard to resist. If you’ve ever enjoyed the crunchy exterior and a flavorful, buttery interior of garlic bread, then you’re in for a treat with these rolls!
Garlic bread rolls are essentially small, pillowy rolls infused with the rich taste of garlic and herbs. They’re often brushed with a mixture of butter, garlic, and parsley before being baked to golden perfection. Even better, they can be creatively customized to your taste—think of adding cheeses or incorporating different herbs like rosemary or oregano. Plus, they make an excellent accompaniment not only for Italian dishes like pasta and marinara but also to soups, salads, or even as a snack on their own.
But why should you make garlic bread rolls? Here are a few reasons to convince you:
-
Versatile Side Dish: Whether you’re whipping up a weeknight dinner or hosting a gathering, garlic bread rolls fit seamlessly into any menu. They can elevate a simple meal to something memorable when shared with friends and family.
-
Easy to Make: Believe it or not, making homemade garlic bread rolls is not as daunting as it sounds. With just a handful of ingredients and a little bit of your time, you’ll have a fragrant batch that rivals store-bought versions.
-
Customizable: The beauty of these rolls is in their versatility. Want to add a cheeky kick? Toss in some red pepper flakes. Prefer an extra cheesy treat? A sprinkle of mozzarella or parmesan will do the trick.
Garlic bread rolls are not just food; they’re an experience—an aroma wafting through your kitchen that calls loved ones to the table. So, wrap up that daily grind, roll up your sleeves, and get ready to impress with a batch of these delightful creations! For a deeper dive into the art of bread making, check out resources like King Arthur Baking or Serious Eats.
Ingredients for Garlic Bread Rolls
Creating delicious garlic bread rolls at home is simpler than you might think! The combination of fragrant garlic and warm bread is irresistible, perfect for a cozy dinner or just a snack. Gather these ingredients to get started:
- Bread Dough: You can use pre-made dough or make your own from flour, water, yeast, and a pinch of salt.
- Butter: Unsalted butter is best for flavor control; it complements garlic beautifully.
- Garlic: Fresh garlic is ideal—minced or crushed for that rich, robust flavor. About 4-6 cloves should do the trick!
- Parsley: Fresh parsley adds a splash of color and a hint of freshness. Dried parsley works in a pinch; just use a bit less.
- Cheese (Optional): Consider a sprinkle of mozzarella or parmesan for an extra cheesy bite.
By using these simple ingredients, you’ll create the best garlic bread rolls that everyone will enjoy. Ready to dive into the preparation? Check out expert opinions on bread-making at The Bread Lab for some pro tips!
Preparing Garlic Bread Rolls
When it comes to comfort food, few items rival the delightful, warm embrace of garlic bread rolls. These little bites of heaven are not just a side dish; they can elevate any meal, making it feel special. In this guide, we will walk through the entire preparation process, ensuring your garlic bread rolls are perfect every time.
Gather Your Ingredients
Before diving into the culinary adventure, let’s make sure you have all the necessary ingredients on hand:
-
For the Dough:
-
4 cups all-purpose flour
-
1 packet of active dry yeast (about 2 ¼ teaspoons)
-
1 teaspoon sugar
-
1 ½ cups warm water (around 110°F or 43°C)
-
2 teaspoons salt
-
2 tablespoons olive oil
-
For the Garlic Butter:
-
½ cup unsalted butter, softened
-
4-6 cloves of garlic, minced (adjust based on your love for garlic)
-
2 tablespoons fresh parsley, chopped (optional, for garnish)
-
Salt to taste
Having everything laid out makes the process smoother and more enjoyable. Plus, it ensures you don’t get caught in the middle of mixing dough only to find you’ve forgotten an essential ingredient!
Make the Garlic Butter
While the dough is rising, let’s whip up the garlic butter. In a medium-sized bowl, combine the softened butter, minced garlic, and a pinch of salt. If you love that burst of freshness, don’t hesitate to add the chopped parsley! Mix it up until everything is well combined. This garlic butter will serve as the delicious heart of our rolls, providing that classic flavor that pairs so well with just about any dish.
Prepare the Dough
Now, onto the dough! Start by dissolving the sugar in warm water in a mixing bowl. Then sprinkle the yeast over the water and let it sit for about 5-10 minutes until it’s frothy. This means it’s active and ready to work its magic.
In a larger bowl, combine the flour and salt. Once the yeast mixture is ready, pour it into the flour, along with the olive oil. Mix until a shaggy dough forms. Don’t worry if it looks a little messy; that’s a sign of freshly made dough!
Kneading and Shaping the Rolls
Once the dough is formed, it’s time for some hands-on action. Lightly flour a clean surface and knead the dough for about 8-10 minutes. You want it to become smooth and elastic. Here’s a tip: if you’re not sure if it’s ready, do the “windowpane test”—stretch a small piece of dough between your fingers, and if it holds its shape without tearing, you’re good to go!
After kneading, divide the dough into equal portions (around 12-15 pieces works well). Shape each piece into a small ball and place them on a baking sheet that you can either oil lightly or cover with parchment paper.
Allow the Rolls to Rise
Cover the shaped rolls with a damp cloth or plastic wrap and let them rise in a warm place for about 30-45 minutes, or until they’ve doubled in size. This step is essential for achieving that light and fluffy texture we all love. But, hey, why not take this time to put on some music or catch an episode of your favorite show?
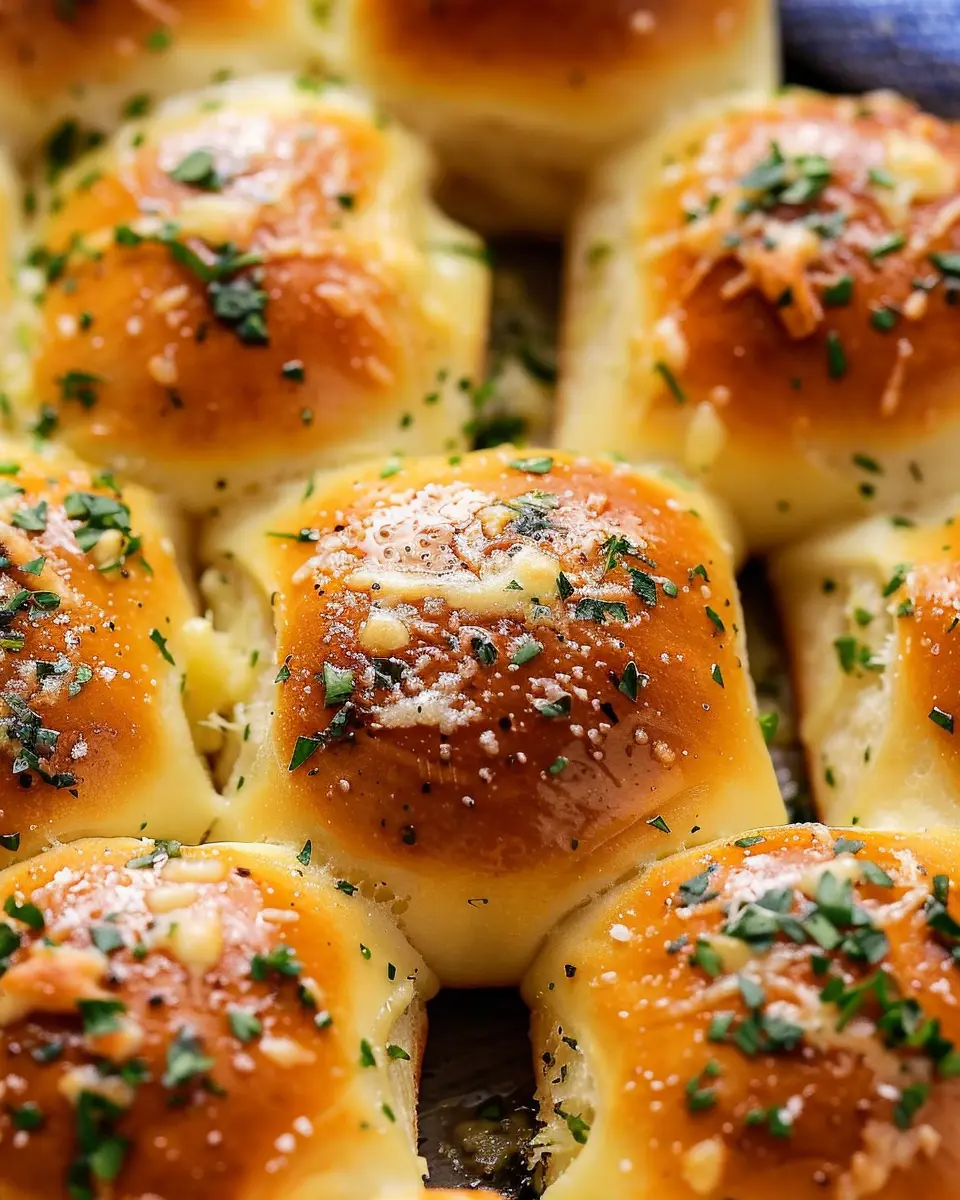
Baking the Rolls
Preheat your oven to 375°F (190°C). Once the rolls have risen, it’s time to slather them with your garlic butter. Use a brush or a spoon to generously coat the tops. Don’t skimp on this—this is going to give them that mouthwatering flavor!
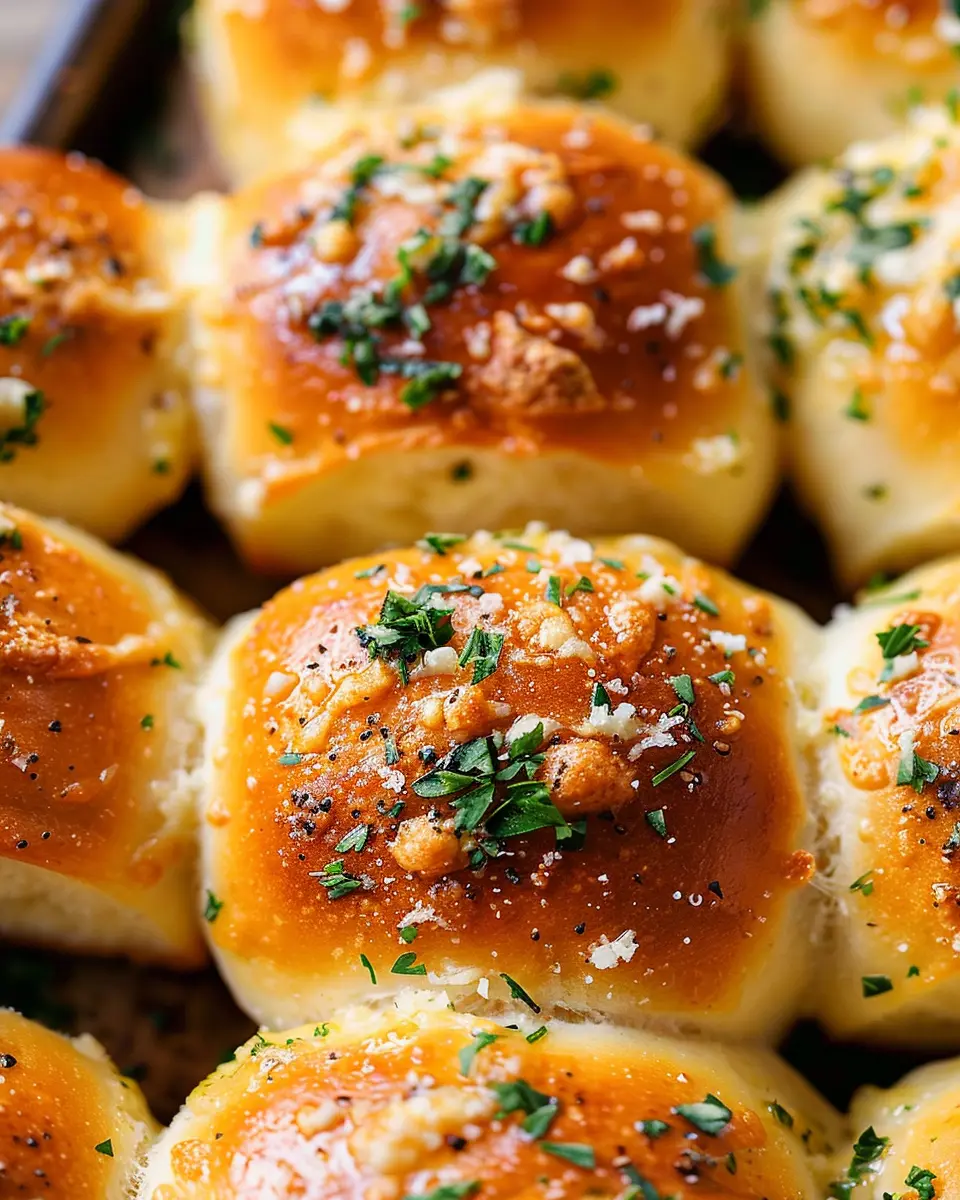
Bake the rolls for about 15-18 minutes or until they’re golden brown. The smell wafting through your kitchen will be absolutely irresistible. Once they’re out of the oven, you can brush on more garlic butter if you’re feeling indulgent. Enjoy your garlic bread rolls fresh out of the oven, perhaps served alongside a refreshing salad or a hearty soup.
By following these steps, you’ll create garlic bread rolls that will impress everyone at your table. Happy baking!
Variations on Garlic Bread Rolls
Garlic bread rolls are a beloved classic, but why stop at the traditional version? Let’s explore a couple of delicious variations that can elevate your garlic rolls into something truly spectacular.
Cheesy Garlic Bread Rolls
Who doesn’t love cheese? Turning your garlic bread rolls into cheesy bites can quickly satisfy your cravings. Just imagine opening a fluffy roll to find gooey mozzarella, sharp cheddar, or even a tangy feta hidden within. Here’s how to give it a try:
- Ingredients to Add:
- Shredded mozzarella (or your favorite melting cheese)
- A sprinkle of Parmesan on top just before baking
- Method:
- Prepare your dough and roll it out.
- Place a spoonful of cheese in the center before rolling it into a ball.
- Bake until golden and cheesy.
Experimenting with different cheese types can make your next dinner even more exciting. You can find more about cheese pairings in this Cheese Pairing Guide.
Herb-Infused Garlic Bread Rolls
Take your garlic bread rolls to the next level with fresh herbs. Adding rosemary, basil, or thyme infuses your rolls with layers of flavor that complement the garlic beautifully. It’s a simple change that adds some delightful Mediterranean charm:
- Ingredients to Add:
- Fresh chopped herbs (like parsley, oregano, or basil)
- Optional: a drizzle of olive oil before serving
- Method:
- Incorporate the herbs into your butter mixture that coats the rolls.
- You can also mix some chopped herbs into the dough for an even stronger flavor.
Feeling adventurous? Why not pair these rolls with a side of homemade marinara for dipping? You can find recipes for simple marinara sauces online that will make this combination shine.
With these variations, you can personalize your garlic bread rolls to suit any occasion, impress your friends at parties, or simply treat yourself after a long day at work. Enjoy!
Cooking Tips and Notes for Garlic Bread Rolls
Garlic bread rolls can be the star of your meal, but getting them just right can feel daunting! Here are some handy tips to ensure your garlic bread rolls are soft, flavorful, and downright irresistible.
Choosing the Right Bread
- Use fresh bread: Opt for a quality baguette or dinner rolls for that perfect texture.
- Avoid stale options: Freshness makes a noticeable difference in taste and chewiness.
The Magic of Garlic Butter
- Customize your garlic butter: Mix in a bit of parsley, oregano, or even chili flakes for a twist.
- Do not skimp on the garlic: Fresh minced garlic provides the best flavor. If you’re in a pinch, garlic powder can work too!
Tips for Perfect Baking
- Give them space: Ensure your rolls are spaced out on the baking sheet to allow for even cooking.
- Keep an eye on them: Start checking for doneness a few minutes before the timer goes off—ovens can vary.
Enjoying Your Rolls
Pair these delicious garlic bread rolls with a fresh salad or warm soup for a satisfying meal. You can even get creative by using them for sliders or as a side for pastas.
Remember, the key to delicious rolls is in the details. So, take your time and enjoy each step! For more delicious ideas, check out sources like Food Network or Serious Eats. Happy cooking!
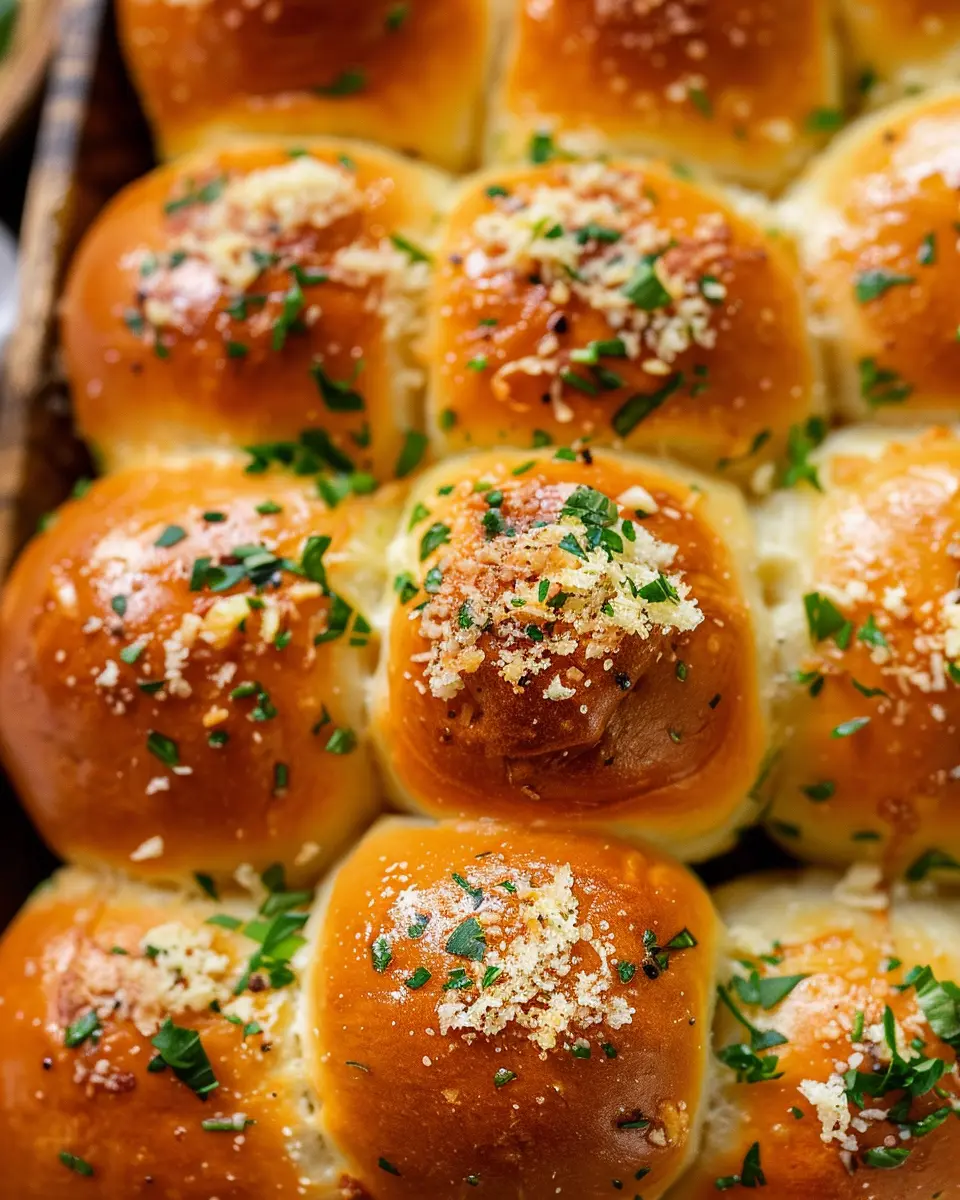
Serving Suggestions for Garlic Bread Rolls
When it comes to enjoying garlic bread rolls, the possibilities are nearly endless! These warm, buttery delights make a fantastic accompaniment to a variety of dishes, elevating your dining experience.
Perfect Pairings
-
Soup: Garlic bread rolls are perfect with a warm bowl of tomato basil soup or a hearty minestrone. The rolls help scoop up every last drop of broth.
-
Salads: Serve these rolls alongside fresh salads, like a classic Caesar or a zesty Greek salad. They add a comforting touch that balances fresh, crisp veggies.
-
Pizza Night: Who doesn’t love a good pizza night? Switch things up by adding garlic bread rolls to the spread. Your guests will appreciate the added flavor dimension.
Alternative Toppings
Consider dressing up your garlic bread rolls with different toppings for variety:
- Top with grated Parmesan and fresh herbs for an Italian twist.
- Slather with a mix of cream cheese and fresh chives for a deliciously creamy bite.
Beverage Pairings
Instead of reaching for wine, try pairing your rolls with sparkling water infused with lemon or a refreshing iced tea. These options maintain the refreshing vibe without overpowering the delightful garlic flavor.
For inspiration on create hearty soups and salads, check out FoodNetwork or BBC Good Food. Happy dining!
Time Breakdown for Garlic Bread Rolls
When you’re ready to make those delightful garlic bread rolls, it’s all about timing! Here’s a quick breakdown to help you plan your kitchen adventure efficiently.
Preparation Time
Get started with about 20 minutes to whip up the dough. This includes measuring ingredients and mixing, so keep a timer handy!
Rising Time
Patience is key here. Allow the dough to rise for about 1 hour in a warm spot, letting it double in size. This is where the magic happens!
Baking Time
Once your rolls are shaped, they’ll need about 15-20 minutes in the oven. You’ll know they’re ready when they’re golden brown and smell incredible.
Total Time
In all, expect around 1 hour and 40 minutes from start to savoring those garlic bread rolls. A perfect weekend project or a cozy weeknight treat!
For more insights on dough rising and the science behind yeast, check out King Arthur Baking. Happy baking!
Nutritional Facts for Garlic Bread Rolls
When indulging in garlic bread rolls, it’s essential to know what’s on your plate. Here’s a quick rundown:
Calories
Each garlic bread roll packs around 150 calories, making it a flavorful treat that doesn’t completely derail your diet. Moderation is key, especially if you’re pairing them with pasta or a hearty salad.
Carbohydrates
In a single roll, you’ll find about 28 grams of carbohydrates, primarily derived from the dough. This is fuel for your energy needs, but be mindful of your overall intake if you’re watching your carb consumption.
Fats
With approximately 4 grams of fat per roll, garlic bread rolls can be enjoyed without heavy guilt. The fats mainly come from butter and olive oil, both of which can have health benefits when consumed thoughtfully.
Understanding these nutritional facts can help you enjoy your delicious rolls while keeping health in mind. If you want to dig deeper into the benefits of whole grains and healthy fats, consider checking out resources from the American Heart Association and Harvard Health.
FAQs about Garlic Bread Rolls
Can I use whole wheat flour for the garlic bread rolls?
Absolutely! Whole wheat flour can be a fantastic option for your garlic bread rolls. It provides a nutty flavor and added nutritional benefits such as more fiber and vitamins. Keep in mind that whole wheat flour can yield denser rolls, so you might want to mix it with some all-purpose flour for a lighter texture. A good starting ratio is 50/50; you can adjust based on your preferences.
How do I store leftover garlic bread rolls?
Storing your leftover garlic bread rolls is easy! Simply place them in an airtight container or wrap them tightly in aluminum foil or plastic wrap. They can be kept at room temperature for about 2 days. If you want to store them longer, consider placing them in the refrigerator or freezer. When freezing, ensure they’re wrapped well to prevent freezer burn. Just reheat them in the oven for a few minutes to revive that fresh-baked flavor!
What can I pair with garlic bread rolls?
Garlic bread rolls are incredibly versatile and can complement a variety of dishes. Here are some delicious pairings:
- Soups: A hearty tomato soup or a creamy potato-leek concoction.
- Salads: Pair with a Caesar salad for a classic combo.
- Pasta: Serve alongside your favorite spaghetti recipes for a filling meal.
- Dips: Enjoy with marinara or a creamy spinach dip for a tasty snack.
These rolls are not just an accompaniment but can shine as a delightful appetizer at your next dinner party! For more inspiration and suggestions on what to serve, check out Food Network’s recipes.
Now that you’ve got the lowdown, it’s time to whip up those garlic bread rolls and enjoy!
Conclusion on Garlic Bread Rolls
Garlic bread rolls are more than just a side dish; they’re a flavor-packed delight that can elevate any meal. Whether you enjoy them with pasta, as a starter, or even as a snack, these rolls bring a taste of comfort that many crave. The beautiful garlic and herb blend paired with buttery goodness offers a perfect balance that can be enjoyed by all.
So why not whip up a batch of these garlic bread rolls for your next gathering or cozy night in? The recipe is straightforward, and the satisfaction is undeniable. If you’re interested in putting a twist on traditional rolls, consider experimenting with different herbs or cheeses for a unique touch. You can find great tips and upgrades for your garlic bread rolls on culinary sites like Food Network or Serious Eats.
Incorporate these rolls into your repertoire—your taste buds will thank you!
PrintGarlic Bread Rolls: Easy Homemade Delight for Every Meal

These garlic bread rolls are a delightful addition to any meal, easy to make and absolutely delicious!
- Prep Time: 15 minutes
- Cook Time: 25 minutes
- Total Time: 1 hour 40 minutes
- Yield: 12 rolls
- Category: Bread
- Method: Baking
- Cuisine: Italian
- Diet: Vegetarian
Ingredients
- 4 cups all-purpose flour
- 2 teaspoons active dry yeast
- 1 teaspoon salt
- 1 cup warm water
- 4 tablespoons unsalted butter
- 4 cloves garlic, minced
- 1 tablespoon fresh parsley, chopped
- 1 teaspoon garlic powder
Instructions
- In a bowl, combine warm water and yeast, let sit for 5 minutes.
- Add flour, salt, and mix until combined.
- Knead the dough for about 5 minutes until smooth.
- Place dough in a greased bowl, cover, and let rise for 1 hour.
- Preheat oven to 375°F (190°C).
- Divide dough into rolls and place on a baking sheet.
- Melt butter and mix with garlic and parsley, then brush over the rolls.
- Bake for 20-25 minutes until golden brown.
Notes
- Let the rolls cool slightly before serving for the best texture.
Nutrition
- Serving Size: 1 roll
- Calories: 150
- Sugar: 1g
- Sodium: 200mg
- Fat: 7g
- Saturated Fat: 4g
- Unsaturated Fat: 2g
- Trans Fat: 0g
- Carbohydrates: 20g
- Fiber: 1g
- Protein: 4g
- Cholesterol: 15mg