Introduction to Easy Oreo Balls
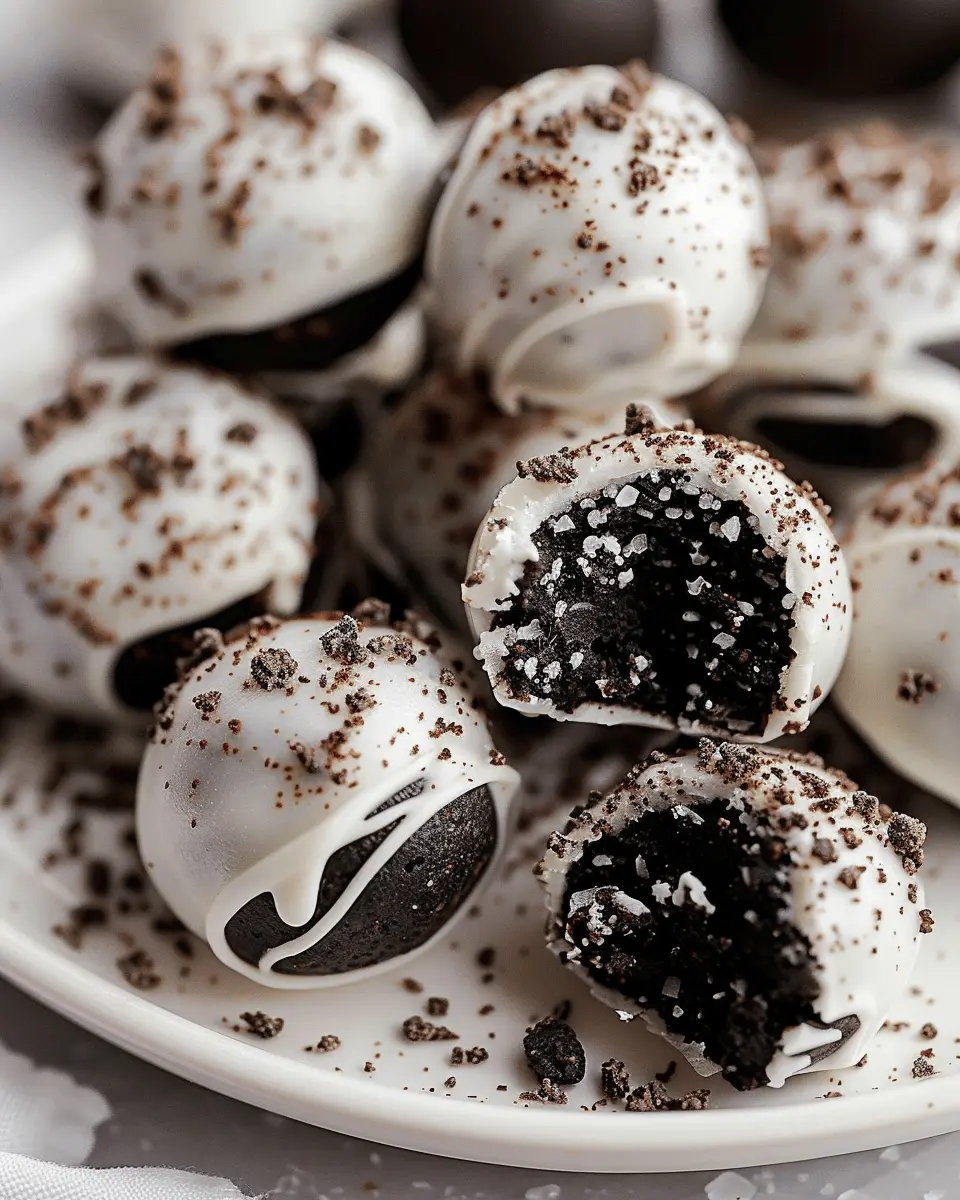
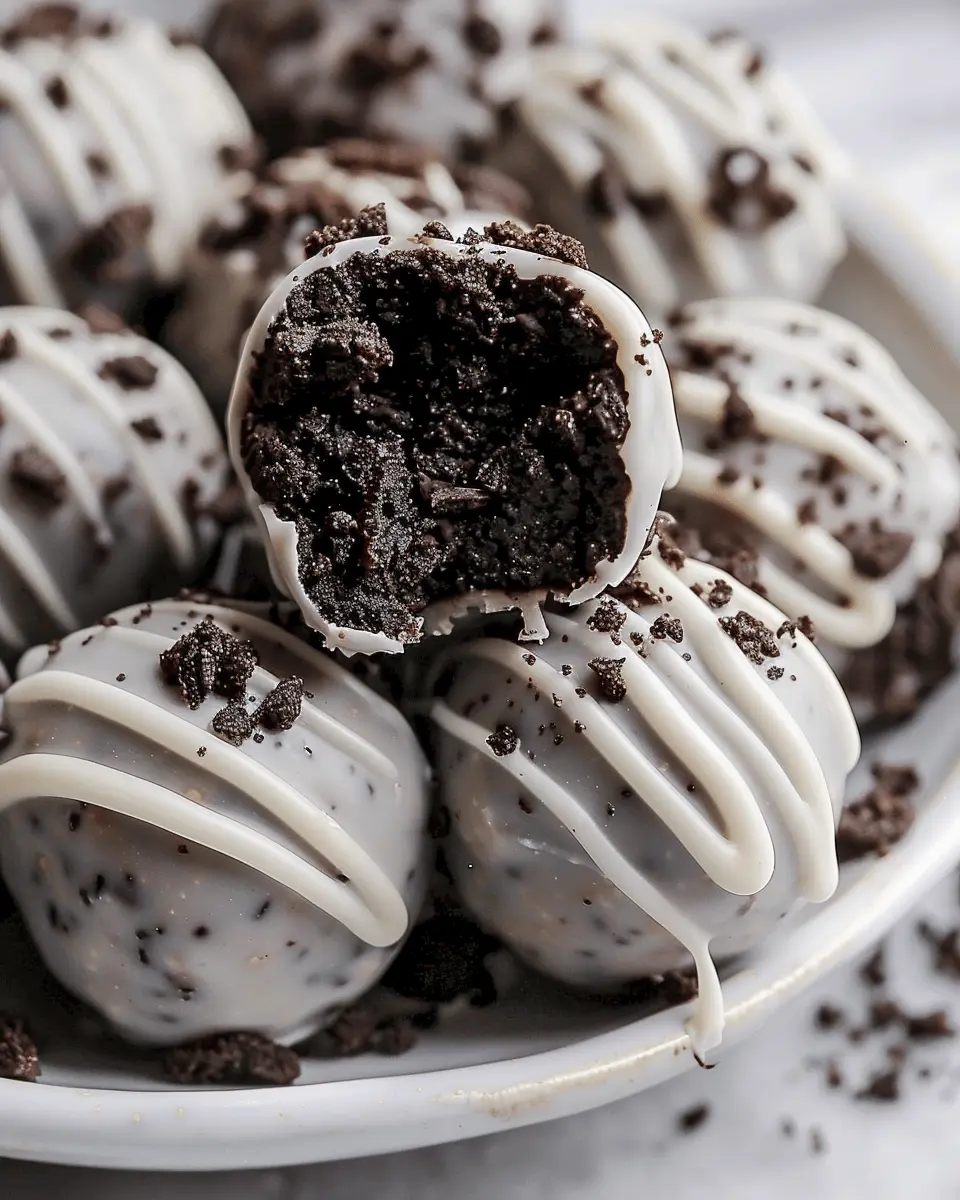
Have you ever craved a sweet treat that’s both indulgent and incredibly simple to make? Enter easy Oreo balls—the dessert that meets all your cravings without any fuss. These delightful bites are not just a bridge between cookie lovers and chocolate enthusiasts; they’re a culinary masterpiece you can whip up in no time. With just four ingredients, they offer a quick, tasty solution for busy weekdays and festive gatherings alike.
What are Easy Oreo Balls and why are they a must-try?
So, what exactly are easy Oreo balls? Imagine taking the classic Oreo cookie, crushing it to a fine powder, and transforming it into a rich, chocolatey delight without any complicated steps. This recipe sidesteps the usual cream cheese or condensed milk, making these bites a lighter option suitable for various diets. Who knew that such simplicity could yield such immense flavor?
These adorable treats are perfect for:
- Last-Minute Gifts: Store them in a jar decorated with a cute ribbon, and you have the perfect gift for friends or family.
- Party Snacks: Whether it’s a birthday bash or a cozy get-together, easy Oreo balls will certainly become the star of the dessert table.
- Personal Treats: Let’s be honest—sometimes we just need a sweet pick-me-up after a long day at work.
The versatility of these Oreo balls means they can be dressed up or down depending on the occasion. Want to impress your guests? Roll them in crushed nuts or drizzle some white chocolate on top. Feeling like keeping it casual? A simple dusting of cocoa powder will do the trick!
If you’re still not convinced, let’s talk about the time and effort involved. Unlike elaborate multi-layered cakes, these easy Oreo balls can be ready to serve in less than an hour, including chilling time! They fit perfectly into that fast-paced life where convenience meets flavor, making them a must-try for anyone looking to satisfy their sweet tooth without the fuss.
For step-by-step guidance, feel free to check out this detailed recipe guide. Your next favorite dessert is just a few minutes away!
Now that you’re all primed to dive into these delightful bites, let’s explore how to create your own batch of easy Oreo balls!
Ingredients for Easy Oreo Balls
Essential ingredients for the delicious treat
Creating easy Oreo balls is a breeze with just four simple ingredients. You don’t even need cream cheese or condensed milk! Let’s dive into what you’ll need to whip up these delightful treats that are sure to impress your friends at any gathering.
-
Oreo Cookies: The star of the show! You’ll want about 36 classic Oreos for a rich, cookie flavor. Feel free to experiment with different Oreo varieties for a fun twist.
-
Chocolate Coating: Choose between milk chocolate or dark chocolate—both are scrumptious! You’ll need about 12 ounces, which will give your Oreo balls a decadent finish.
-
Coconut Oil: Just a tablespoon or two, this helps thin the chocolate for easy dipping. It also adds a lovely sheen, elevating the presentation.
-
Optional Toppings: Consider sprinkles, crushed nuts, or additional crushed Oreos for that extra flair. They add texture and make your easy Oreo balls stand out!
Once you have these ingredients, you’re just minutes away from creating a sweet sensation! For more baking tips and ideas, check out resources like Baker’s Delight or The Kitchn. Happy baking!
Preparing Easy Oreo Balls
Are you ready to discover how to whip up a batch of easy Oreo balls that are sure to impress friends and family? This delightful treat is not just harmonious in flavor but also incredibly simple to make with just four ingredients. Whether you’re planning a party, holiday gathering, or just a sweet treat for yourself, these no-bake Oreo balls are perfect for any occasion. Let’s break it down step by step.
Gather Your Ingredients
Before you dive in, the first thing to do is gather your ingredients. Here’s what you’ll need:
- Oreo cookies: The classic chocolate ones are perfect, but feel free to experiment with other flavors.
- Instant dry pudding mix: Vanilla or chocolate works best. This will give your balls that creamy texture without needing cream cheese or condensed milk.
- Milk: Just regular dairy or your favorite non-dairy milk will do the trick!
- Chocolate for coating: You can opt for milk chocolate, dark chocolate, or even white chocolate if you’re feeling adventurous.
Once you have everything ready, you’re all set to create something delicious!
Crush the Oreo Cookies to Perfection
Here comes the fun part. Start by crushing those Oreos. You want a fine consistency to ensure that each bite is packed with flavor.
- Place the Oreo cookies into a large zip-top bag, seal it, and crush them with a rolling pin.
- Alternatively, you could use a food processor if you have one handy — just pulse until you achieve that lovely, fine crumb.
Remember, the more finely you crush the cookies, the smoother your easy Oreo balls will turn out.
Mix in the Dry Pudding and Milk
Next, it’s mixing time! Transfer the crushed Oreos into a large mixing bowl, and add in your dry pudding mix. This step is crucial: it infuses the mixture with a delightful creaminess.
- Gradually add in about 1/4 cup of milk. Start with less and add more if needed — you want the mixture to be moist but not too wet.
- Stir everything together until it forms a thick, dough-like consistency. This is where the magic begins!
Form Your Oreo Balls
Now that your mixture is ready, it’s time to get hands-on.
- Use your hands to scoop out about a tablespoon of the mixture and roll it into a ball. Aim for a consistent size so that all your easy Oreo balls have a similar appearance and bake evenly.
- Place them on a parchment-lined baking sheet.
As you roll, you might find yourself sneaking a taste of the dough — but try to save some for the coating!
Coat in Melted Chocolate
This is the moment your easy Oreo balls transform into something truly divine.
- Melt your choice of chocolate in the microwave or using a double boiler. Be careful not to overheat; you want it melted but not burned!
- Using a fork or a toothpick, dip each Oreo ball into the melted chocolate, ensuring it’s fully coated. Let any excess chocolate drip off before placing it back on the lined baking sheet.
After you’ve coated all the balls, allow them to set. You can pop them in the fridge for quick hardening or leave them at room temperature.
Now, there you have it! A simple guide to prepare easy Oreo balls that require no cream cheese or condensed milk. For more similar sweet treats, consider exploring recipes that use similar ingredients, perhaps chocolate-covered strawberries or truffle recipes. With just a few steps, you’ll present a dessert that feels extravagant but is oh-so-easy to make. Happy baking!
Variations on Easy Oreo Balls
Creating easy Oreo balls is a breeze, but did you know that you can elevate this simple treat with a few clever variations? Let’s explore some fun flavor twists and healthier alternatives that will surprise and delight your taste buds.
Fun Flavor Twists: Mint, Peanut Butter, and More
Why stick to the classic when you can explore incredible flavors? Here are some ideas to get your creativity flowing:
-
Mint Oreo Balls: Swap the traditional Oreos for mint-flavored ones. A drizzle of dark chocolate on top will intensify the minty freshness.
-
Peanut Butter Delight: Combine crushed Oreos with creamy peanut butter. Roll into balls, then coat with milk chocolate for a scrumptious treat that satisfies your sweet and salty cravings.
-
Coconut Craze: Toss in shredded coconut to the mix for a tropical twist. Don’t forget to roll them in more coconut flakes before serving!
These variations not only add excitement to your easy Oreo balls but also let you cater to different tastes or special occasions.
Healthier Alternatives: Reduced Sugar and Dairy-Free Options
If you’re looking to indulge without the guilt, try these alternatives:
-
Reduced Sugar: Opt for reduced-sugar Oreos and use a stevia-based chocolate coating. You’ll enjoy the same great flavor with fewer calories.
-
Dairy-Free Options: Use dairy-free chocolate and a blend of coconut cream with the crushed Oreos to create a delectable treat that everyone can enjoy.
With these variations in your arsenal, you can tailor your easy Oreo balls to fit any occasion or dietary need. Which variation will you try first? For more inspiration, check out EatingWell’s Guide to Healthy Treats that focuses on enjoyable yet guilt-free indulgences.
Baking Tips and Notes for Easy Oreo Balls
Creating easy Oreo balls is a delightful adventure! Here are some baking tips to ensure your treats turn out perfectly every time.
Tips to Ensure Your Oreo Balls Turn Out Perfect
-
Choose the right chocolate: Using a high-quality melting chocolate will enhance the flavor, making all the difference. Consider semi-sweet or dark chocolate for a rich taste.
-
Chill your mixture: After combining the crushed Oreos with the other ingredients, let the mixture chill in the refrigerator for about 30 minutes. This makes it easier to shape into balls and ensures they hold together well.
-
Control the size: Use a cookie scoop to ensure uniformity, which allows for even coating and perfect bite-sized treats.
-
Dip with care: For a smooth coating, tap the chocolate-covered balls gently on the edge of the bowl to remove excess chocolate.
-
Decorate creatively: Add sprinkles, crushed Oreos, or even a drizzle of white chocolate for a stunning finish!
By following these tips, you’ll create delicious, no-fail Oreo balls that impress your friends and family. Need more inspiration? Check out Baking Basics for expert advice!

Serving suggestions for Easy Oreo Balls
Creative ways to present and enjoy your Oreo balls
Ready to impress your friends with those easy Oreo balls? Aside from being super delicious, these treats can be presented in several unique ways that will elevate your dessert table.
-
Colorful Sprinkles: Roll your Oreo balls in colorful sprinkles or crushed nuts for a visual treat. It adds a pop of color and makes them more festive for parties or gatherings.
-
Chocolate Drizzle: Use melted dark or white chocolate to drizzle over the balls for an artistic touch. Not only does it look appealing, but it enhances the chocolate flavor, too.
-
Mini Dessert Shooters: Create mini dessert shooters with layers of crushed Oreo balls and whipped cream. This fun presentation is perfect for parties and allows guests to indulge without feeling too guilty.
-
Gift Boxes: Package your easy Oreo balls in small gift boxes or jars to share with friends or coworkers. Include a cute note celebrating the occasion—perfect for holidays or thank-you gifts!
For serving suggestions that keep your dessert game strong, consider checking out Food Network and Martha Stewart for more creative ideas!
Time Details for Easy Oreo Balls
Preparation Time
Making these easy Oreo balls is a breeze! All you need is about 20 minutes to gather your ingredients, crush the Oreos, and mix everything together. Don’t worry about precision—just have fun with it!
Chilling Time
Once your mixture is ready, roll it into balls and let them chill in the refrigerator for at least 30 minutes. This step is crucial for achieving that perfect firmness and texture.
Total Time
In total, you’ll be spending around 50 minutes to create these delicious treats. Perfect for a last-minute dessert or a fun party snack! For tips on how to incorporate these easy Oreo balls into different occasions, check out our suggested serving ideas here.
Nutritional information for Easy Oreo Balls
When you’re whipping up these easy Oreo balls, it’s good to know what deliciousness is packed into each bite. Here’s a quick breakdown of their nutritional profile to keep you informed:
Calories
Each easy Oreo ball contains approximately 90 calories. Ideal for a sweet treat that won’t break the calorie bank, right? Just be mindful of portion sizes if you’re tempted to indulge!
Carbohydrates
With about 10 grams of carbohydrates per ball, these bite-sized delights are certainly not devoid of sugar. They cater to your sweet cravings while still being easy to fit into most diets. Remember, a little treat now and then can be a wonderful part of a balanced diet.
Fat Content
You’ll find roughly 4 grams of fat in each serving. This makes them a rich snack! The key is moderation—enjoying these gooey bites in small portions can satisfy your sweet tooth while keeping your options open for healthier foods throughout the day.
For more insights on snack choices, visit the American Heart Association for guidelines on maintaining a balanced diet. Creating treats that satisfy both cravings and health goals is totally possible!
FAQs about Easy Oreo Balls
When it comes to creating easy Oreo balls, there’s a lot to consider, especially if you’re new to making this delightful treat. Here’s a quick rundown of some common questions and answers to help you enjoy these delectable bites!
Can I freeze Oreo balls for later?
Absolutely! Freezing easy Oreo balls is a great way to keep them on hand for a last-minute treat or surprise guests. Simply place them in an airtight container or a zip-top bag, separating layers with parchment paper to prevent sticking. They’ll stay fresh in the freezer for up to three months. When you’re ready to enjoy, just let them thaw in the fridge for about an hour.
What’s the best way to store Oreo balls?
For optimal freshness, store your easy Oreo balls in an airtight container at room temperature. Make sure to consume them within one week, as they taste best when fresh. If you notice they’re not going to be eaten soon, the fridge is a solid option, but you’ll want to be cautious about condensation.
Can I use different kinds of cookies?
Definitely! While classic Oreo cookies create a beloved flavor profile, feel free to get creative. Give it a go with flavors like chocolate mint, peanut butter, or even golden Oreos. The flexibility in cookie choice allows you to customize these treats to your taste.
Looking for more inspiration? Check out this guide on how different flavors and textures can affect dessert recipes! The Science of Flavor Pairing.
With these FAQs in mind, you’re all set to whip up your own batch of easy Oreo balls! Enjoy the process and the delicious results!
Conclusion on Easy Oreo Balls
Recap and Encouragement to Try This Simple Recipe
To wrap it up, these easy Oreo balls are not just a treat; they’re a delightful way to impress friends or satisfy a sweet tooth without a fuss. With only four ingredients, you can whip up a batch in no time. Plus, the versatility of this recipe means you can easily adjust it to add your personal touch or even experiment with flavors!
Don’t hesitate to give it a go—whether for a party, a cozy night in, or as a special surprise. Your taste buds will thank you! If you’re curious about variations, check out sites like Food Network for more inspiration. Happy baking!
PrintEasy Oreo Balls: Indulgent 4-Ingredient Treats Without Cream Cheese

Deliciously simple 4-ingredient Oreo balls that require no cream cheese or condensed milk, perfect for a quick treat.
- Prep Time: 20 minutes
- Cook Time: 5 minutes
- Total Time: 25 minutes
- Yield: 24 balls
- Category: Dessert
- Method: No-Bake
- Cuisine: American
- Diet: Vegetarian
Ingredients
- 1 package Oreo cookies
- 1/2 cup peanut butter
- 2 cups chocolate chips
- 1 tablespoon vegetable oil
Instructions
- Crush the Oreo cookies in a food processor until fine.
- Mix in the peanut butter until fully combined.
- Form the mixture into balls and place them on a baking sheet.
- Melt the chocolate chips with the vegetable oil, then dip the balls into the chocolate.
- Chill the dipped Oreo balls until the chocolate hardens.
Notes
- For a different flavor, try adding a splash of vanilla extract.
- Make sure to use a good quality chocolate for coating.
Nutrition
- Serving Size: 1 ball
- Calories: 100
- Sugar: 10g
- Sodium: 50mg
- Fat: 5g
- Saturated Fat: 2g
- Unsaturated Fat: 3g
- Trans Fat: 0g
- Carbohydrates: 12g
- Fiber: 1g
- Protein: 2g
- Cholesterol: 0mg