Introduction to No-Bake Protein Ball Recipes
If you’re a busy young professional juggling work, social life, and personal fitness, you may find it challenging to maintain a balanced diet while keeping pace with your hectic schedule. That’s where no-bake protein ball recipes come to the rescue! These nutrient-packed snacks are quick to make and even easier to grab on your way out the door.
Why No-Bake Protein Balls Are a Game-Changer for Busy Young Professionals
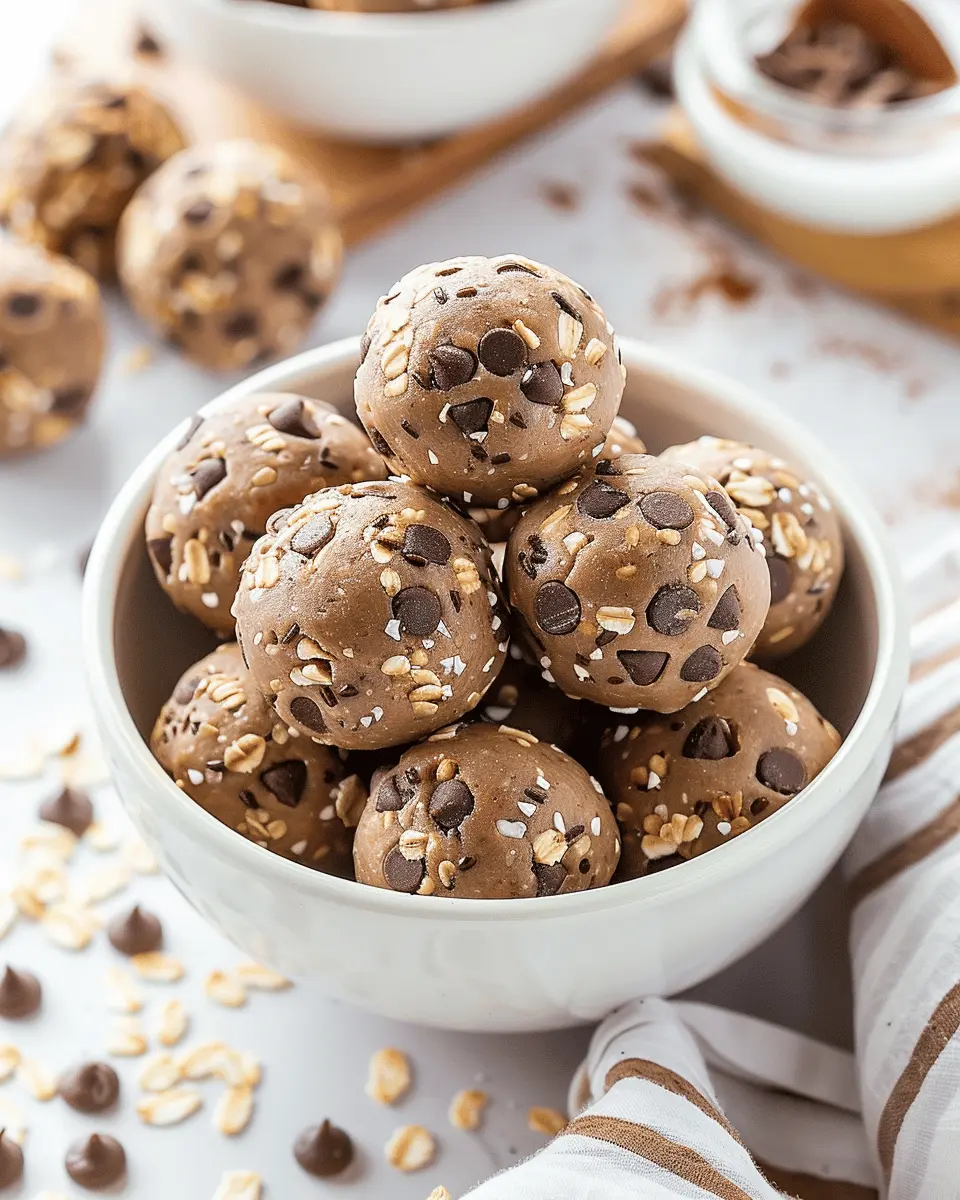
Imagine this: you’re rushing out the door, late for a meeting but craving something nutritious. Instead of reaching for that sugary muffin or unfulfilling granola bar, you can grab a no-bake protein ball from your fridge. With just a few simple ingredients, such as oats, nut butter, and protein powder, these tasty bites provide the energy you need without the guilt.
-
Time-Efficient: The average young professional saves countless hours by preparing a batch of protein balls in advance. With little prep time and no baking involved, you can whip up a full batch, store them in your fridge, and grab them throughout the week.
-
Customizable: One of the greatest benefits is that you can tailor the flavors to your liking! Whether you’re in the mood for chocolate, vanilla, or fruity tastes, you can mix and match ingredients to create your perfect snack. And don’t worry about dietary restrictions — you can easily make them gluten-free, vegan, or even high-protein by swapping out components.
-
Healthy Fuel: Snacking doesn’t have to derail your clean-eating goals. Each protein ball is packed with nutritious ingredients, providing protein, healthy fats, and fiber to keep you satisfied. Nutritionists even recommend incorporating protein-rich snacks into your diet to help control appetite and fuel your workouts, as discussed in this article on healthy snacking from Healthline.
-
Portable: These little powerhouses are not only easy to make but also perfectly portable. Toss a couple in your bag or lunch for a quick, energizing snack anytime!
So, if you’re looking for a solution to satisfy hunger without the hassle, no-bake protein ball recipes might just become your new best friend! Stay tuned to discover ten deliciously simple versions that can enhance your clean eating journey.
Ingredients for No-Bake Protein Balls
When it comes to easy no-bake protein ball recipes, simplicity and nourishment go hand in hand. Here’s a rundown of the core ingredients you’ll need for these delightful treats.
Core ingredients you’ll need
Creating your protein balls is a breeze! Gather these key ingredients:
- Nut Butters: Think almond butter or peanut butter for that creamy texture. They not only hold everything together but also pack a protein punch.
- Oats: Rolled oats provide great fiber and bulk, making your snacks filling and satisfying.
- Protein Powder: Choose your favorite flavor—whey, pea, or hemp—depending on your dietary preferences. It’s the star ingredient that boosts the protein content.
- Seeds and Nuts: Flaxseeds or chia seeds add omega-3 fatty acids, while walnuts or almonds contribute healthy fats and a nice crunch.
- Natural Sweeteners: Options like honey or maple syrup sweeten the mix naturally without refined sugars.
These easy-to-find ingredients ensure your no-bake protein ball recipes are not just delicious, but also aligned with your clean eating goals. Dive into experimenting with flavors and textures—you might just find your new favorite snack! For more inspiration, check out resources like the Academy of Nutrition and Dietetics for expert tips on healthy snacking.
Step-by-Step Preparation of No-Bake Protein Balls
Creating your own no-bake protein balls is not only a fun kitchen project, but it’s also a fantastic way to enjoy healthy snacks on the go! These little power-packed bites are loaded with protein, perfect for a quick energy boost, or a post-workout treat. Let’s dive into the step-by-step process of preparing them.
Gather Your Ingredients
The first thing you’ll want to do is gather all your ingredients. The beauty of no-bake protein ball recipes is their versatility—feel free to customize based on your preference! Here’s a basic list to get you started:
- Protein powder (whey or plant-based)
- Oats (rolled or quick oats work)
- Nut butter (almond, peanut, or even sunflower butter for nut-free options)
- Sweeteners (honey, maple syrup, or agave)
- Mix-ins (chocolate chips, dried fruit, nuts, or seeds)
Make sure to have everything ready to go. This not only speeds up the process but also makes it more satisfying—as you get to see all those wholesome ingredients at a glance!
Mix the Dry Ingredients
Once you have your ingredients at hand, it’s time to mix the dry components. In a medium-sized bowl, add your oats and protein powder. If you’re using any dry mix-ins like chia seeds or ground flaxseed, now’s the time to include them. This step is crucial; dry ingredients should be evenly incorporated to ensure a consistent flavor and texture throughout the protein balls.
Here’s a quick tip: the oats provide a nice chewy texture and give you sustained energy. Did you know that oats are a great source of dietary fiber, which can help you feel full longer? So, you’re not just snacking—you’re making a smart choice!
Combine with Nut Butter and Sweeteners
Now for the fun part! Add the nut butter (or seed butter) and your chosen sweetener to the bowl of dry ingredients. This will create a sticky mixture that should hold together once mixed. It’s a good idea to use a spatula or your hands here to thoroughly combine everything.
If you find the mixture too dry, don’t hesitate to add a splash of milk—dairy or plant-based will do just fine! The goal is a dough that is not too crumbly but also not overly sticky. Taste-testing at this point is highly encouraged!
Form Into Balls
Once you have your mixture perfectly blended, it’s time to shape them into bites. Take a small portion of dough (about one tablespoon or so) and roll it between your palms to form a ball. This step is where your creativity can shine—feel free to roll them in some shredded coconut or chopped nuts for an added coating.
If you have friends or family around, this is a great time for a mini assembly line. It makes the process a bit quicker and can turn into a fun bonding experience!
Optional Glaze for an Extra Touch
For those special occasions or when you’re feeling fancy, consider adding a simple glaze. Melt some dark chocolate or mix dark cocoa powder with a little coconut oil to create a silky drizzle to pour over the protein balls. This optional glaze adds an indulgent touch without compromising the health benefits.
After glazing, place your protein balls on a parchment-lined tray. Refrigerate them for about 30 minutes to help them set; this makes them easier to handle and enhances the flavors!
And there you have it—a delightful recipe that’s not only easy to prepare but can satisfy any sweet tooth while aligning perfectly with your clean eating goals. As a busy professional, whipping up no-bake protein balls can ensure you always have a nutritious snack at hand. For more inspiration, consider checking out sites like Nutrition Stripped or Minimalist Baker for additional variations that you can try. Happy snacking!
Variations on No-Bake Protein Balls
When it comes to no-bake protein ball recipes, the possibilities are nearly endless. Here’s how you can mix things up to keep your snacking fresh and exciting!
Indulgent Chocolate-flavored Protein Balls
Who doesn’t love chocolate? It’s easy to transform your ordinary protein balls into a decadent treat. Simply mix in cocoa powder or use chocolate-flavored protein powder as your base. For an added twist, consider throwing in some mini dark chocolate chips or a swirl of nut butter. Not only does this provide a rich taste, but it also boosts the nutritional profile, adding healthy fats and antioxidants.
Nut-Free Versions for Allergy-Friendly Options
If you or someone in your life has nut allergies, don’t fret! You can create a delightful nut-free protein ball by using seeds like sunflower or pumpkin instead. These alternatives are just as tasty and packed with protein. Another option is to skip the seeds altogether and rely on wholesome oats, dates, and a bit of honey for sweetness. These no-bake protein ball recipes are perfect for kids’ snacks or to bring to gatherings!
Seasonal Themed Protein Balls
Why not celebrate the seasons with themed protein balls? In fall, try adding pumpkin puree and spices to create a cozy flavor that pairs wonderfully with your morning coffee. Winter calls for peppermint extract and crushed candy canes, while summer is all about refreshing flavors—think coconut and lime. Transforming these no-bake protein balls into seasonal delights can make them extra special!
In summary, whether you’re leaning towards chocolatey goodness, allergy-friendly alternatives, or seasonal variations, these options ensure your snacks never feel repetitive! For more ideas, check out Healthline’s guide to protein balls. Enjoy making these variations, and snack smart!
Cooking Tips and Notes for No-Bake Protein Balls
Key techniques for optimal texture
When creating your no-bake protein ball recipes, achieving that perfect balance between chewy and firm is essential. Here are some handy tips:
- Mixing: Use a food processor for a uniform consistency. This ensures that ingredients like oats, nut butter, and protein powder are well combined.
- Liquid Ratio: Be cautious with liquids; too much can make your protein balls soggy. Start with less, adding more only if necessary.
- Chilling: After mixing, refrigerate the mixture for 30 minutes. This makes it easier to roll into balls and helps them hold their shape better.
Storage recommendations for freshness
To keep your no-bake protein balls tasty and fresh for as long as possible, follow these storage tips:
- Refrigeration: Store them in an airtight container in the fridge. They generally last about a week—but trust me, they might not last that long!
- Freezing: For extended shelf life, freeze your protein balls. Place them in a freezer-safe bag, and they can last for up to three months. Thaw them overnight for a quick snack option!
These simple tips will make your protein ball-making experience enjoyable and ensure your healthy snacks remain delicious! For more inspiration, you might find it helpful to visit sources like Healthline for nutrition insights.
Serving Suggestions for No-Bake Protein Balls
Perfect Pairings with Smoothies or Yogurt
No-bake protein balls are the ultimate snack, especially when you pair them with creamy smoothies or yogurt for a nutrition boost. Try crumbling a few of your favorite no-bake protein ball recipes over a bowl of Greek yogurt. This adds a delightful crunch and enhances the flavor profile. Alternatively, mix a couple of protein balls into your morning smoothie for an extra energy kick that will keep you satisfied throughout your busy day. Did you know that yogurt with higher protein content can help keep you fuller longer? Check out this guide on high-protein yogurt for some fantastic options.
Creative Serving Options for Gatherings
Are you hosting friends for brunch or a casual gathering? Transform those no-bake protein balls into a centerpiece! Arrange them on a colorful platter and pair them with fresh fruit, nut butters, or even a drizzle of dark chocolate. It’s not only visually appealing but gives everyone a chance to customize their snack. You could also form them into larger balls, perfect for sharing, or even roll them in shredded coconut for a tropical twist! These protein-packed delights are sure to impress your guests and spark conversation about healthy eating.
Time Breakdown for No-Bake Protein Balls
Preparation Time
Getting started with these no-bake protein ball recipes is a breeze! You’ll need about 10-15 minutes for prep. Just gather your ingredients, mix them together, and roll your balls — easy peasy!
Refrigeration Time
For optimum flavor and texture, pop those protein balls in the fridge. They’ll need about 30-60 minutes to firm up before you dive in. This chilling time helps meld the flavors beautifully.
Total Time
In total, you’re looking at roughly 40-75 minutes from start to finish. This means you can whip up a batch in no time for a quick snack or post-workout boost. Perfect for busy schedules!
Creating these delicious snacks is not only simple but also a delightful way to maintain your healthy eating habits. Want to explore more about clean eating? Check out resources like the Eat Right website for tips and guidance.
Nutritional Facts for No-Bake Protein Balls
When it comes to no-bake protein ball recipes, understanding the nutritional benefits can help you make healthier choices. Here’s a quick breakdown of what you’re getting in each satisfying serving.
Calories per Serving
On average, a serving of these protein balls contains around 150-200 calories. This makes them a convenient snack that won’t derail your healthy eating goals.
Protein Content
These little bites pack a punch with approximately 7-10 grams of protein per serving, giving you a great energy boost and helping with muscle recovery. That’s a fantastic way to fuel your workouts or get through that mid-afternoon slump!
Other Important Nutrients
Beyond protein, no-bake protein balls offer a variety of nutrients:
- Fiber: Essential for digestive health, usually around 3-5 grams.
- Healthy Fats: From nut butters and seeds, contributing to heart health.
- Vitamins and Minerals: Ingredients like oats and nuts provide important nutrients, such as magnesium and vitamin E.
These nutrient-dense bites are perfect for clean eating and weight management. For a deeper dive into the components of specific recipes, check out sources like the USDA Nutritional Database for detailed breakdowns.
FAQs about No-Bake Protein Balls
Can I use different protein powders?
Absolutely! One of the best things about no-bake protein ball recipes is their versatility. Whether you prefer whey, casein, plant-based protein, or even collagen powder, feel free to mix and match. Just keep in mind that not all protein powders have the same consistency or flavor profile. If you’re swapping out a protein powder, you may need to adjust the liquid or sweetener in your recipe to maintain the perfect texture. If you’re unsure, check the recommendations on the protein powder packaging for guidance.
How long do they last in the fridge?
When stored in an airtight container, your delicious protein balls can last about one week in the fridge. To maintain optimal freshness, it’s best to keep them in the coldest part of your fridge (away from the door). For longer shelf life, consider storing them separately on parchment paper to prevent sticking, and always double-check for any signs of spoilage before consuming.
Can I freeze them for later?
Yes! Freezing is an excellent option if you’ve made a big batch and want to save some for later. Simply place the protein balls in a single layer on a baking sheet for about an hour. Once they’re firm, transfer them into a freezer-safe bag or container, where they can last for up to three months. Just take them out a few minutes before you’re ready to enjoy; they thaw beautifully!
For more tips on meal prep and storage, check out this expert advice. Embrace the convenience of these snacks; they’re perfect for busy days!
Conclusion on No-Bake Protein Balls
In summary, our collection of no-bake protein ball recipes offers a delicious and convenient way to fuel your body while keeping your clean eating efforts on track. These little bites are packed with nutrients, perfect for snacking or a quick meal replacement.
We encourage you to experiment with the recipes and customize them to suit your taste preferences. Need more inspiration? Check out resources like the Academy of Nutrition and Dietetics for tips on incorporating more protein into your diet. Whether you’re looking to lose weight or simply enjoy a healthy treat, these protein balls are a fantastic option. Don’t wait—give them a try today!
PrintNo-Bake Protein Ball Recipes: 10 Easy Clean Eating Snacks for Weight Loss

Discover 10 easy no-bake protein ball recipes that are perfect for clean eating and weight management.
- Prep Time: 10 minutes
- Total Time: 40 minutes
- Yield: 20 balls
- Category: snacks
- Method: no-bake
- Cuisine: American
- Diet: vegan, gluten-free
Ingredients
- 1 cup rolled oats
- 1/2 cup nut butter
- 1/4 cup honey or maple syrup
- 1/2 cup protein powder
- 1/4 cup dark chocolate chips
- 1/2 cup ground flaxseed
- 1/2 cup shredded coconut
- 1 tsp vanilla extract
- 1/2 tsp salt
Instructions
- In a large mixing bowl, combine rolled oats, nut butter, and honey/maple syrup.
- Add protein powder, dark chocolate chips, ground flaxseed, shredded coconut, vanilla extract, and salt.
- Mix until well combined.
- Roll the mixture into small balls.
- Refrigerate for at least 30 minutes.
- Store in an airtight container in the refrigerator.
Notes
- For a vegan option, replace honey with maple syrup.
- Feel free to customize with your favorite mix-ins.
Nutrition
- Serving Size: 1 ball
- Calories: 120
- Sugar: 6g
- Sodium: 50mg
- Fat: 6g
- Saturated Fat: 1g
- Unsaturated Fat: 4g
- Trans Fat: 0g
- Carbohydrates: 14g
- Fiber: 3g
- Protein: 4g
- Cholesterol: 0mg